Tip: the Available to Pick status light will be either Green (meaning that there is sufficient physical stock to satisfy the fulfilment) or Amber.(meaning that there is insufficient physical stock for one or more of the items included on the fulfilment.

This available to pick status light needs to be added

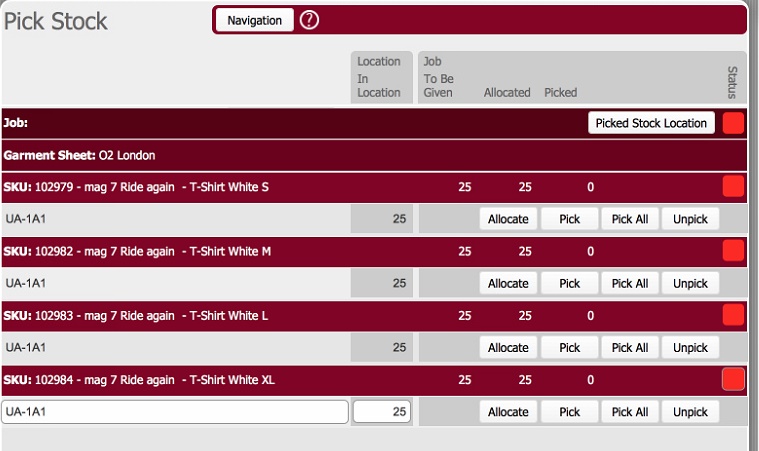
The Pick Stock form shows for each product (SKU) on the fulfilment
- The physical location(s) it is stored in
- The quantity in each physical location
- The quantity
required (To be Given), quantity
allocated, and the quantity already
picked
The following steps are outside the remit of the system but included here for completeness
The quantity picked from each location needs to be recorded in the application.
- This will cause a picking dialog box to display
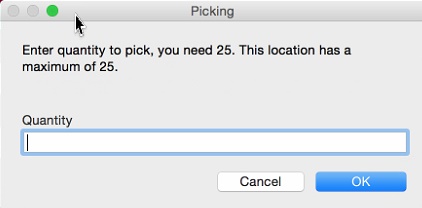
- In the Quantity field,
enter the number of items that were picked from that location,
and click OK
The following happens:-- Picked Quantity is credited with the Quantity entered in step 8b)
- Quantity for the Location is debited by Quantity entered in step 8b)
- The Picked status
will update as follows:-
- Amber (In Progress) if picked quantity < To be Given
- Green (Completed)
if picked quantity
= To Be Given
- This will pick the minimum
of whatever is available in stock in the location for the Amount
needed to be picked, i.e.
Set "amount needed to be Picked" by calculating (To be Given minus Picked)
- Set "amount that can be picked from location" by calculating min (Location balance, amount needed to be Picked)
- Picked Quantity is credited by amount that can be picked from location.
- Quantity for the Location is debited by amount that can be picked from location.
- The Picked status
will update as follows:-
- Amber (In Progress) if picked quantity < To be Given
- Green (Completed)
if picked quantity
= To Be Given
Enhancment: PJ comment - Maybe this requires validation when there is insufficient stock?
- Click the Picked Stock Location
button at the top of the form
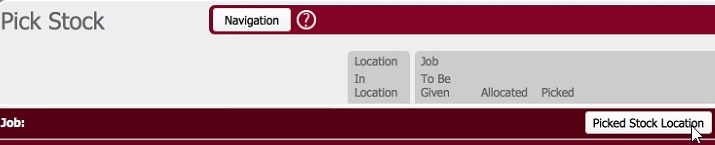
- In the Picked stock location
pop-up form that is shown, click on the Move
button
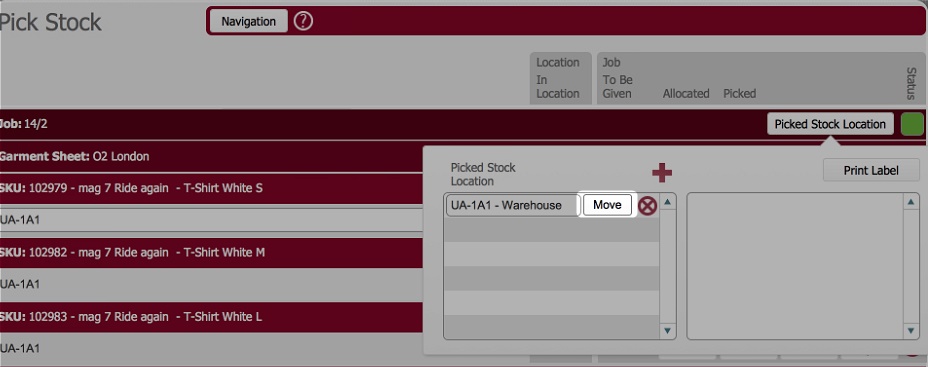
- This invokes the location
picker dialog, where you need to record the location
where you have placed the all of the picked items.
Click the drop-down on the end filter and select Ready to Pack
In the location records that are displayed, click the Select button besides the location where you placed the picked items
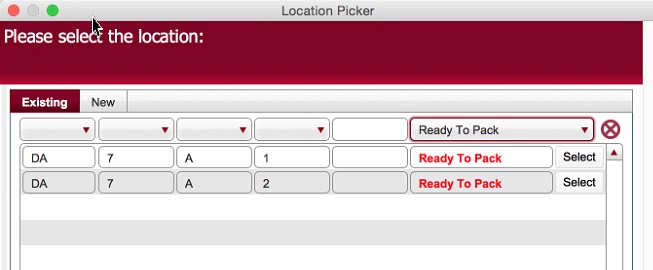
Click here to read more information on location picker, including how to create a new location.
- You are navigated back to the Pick
Stock layout.
- Click the Print
Label button to produce a label which contains the
following information
- The Job number
- Job Description
- Fulfilment contents
This should be affixed to the box(es) of picked products that were placed in the selected location.