Creating Stand Alone Fulfilments
Background
Typically, a fulfilment is associated to a job order, and denotes where
the output produced from that job order should be despatched to.
However, it is possible to create a "Stand-Alone
fulfilment" - that is, one not related to a job order.
The rationale for doing this might be that you need to despatch stock
items (that were not produced through a job order)
Note: In terms of functionality,
when you create a stand alone fulfilment, you are in actuality creating
a blank job order record (i.e. no process line details) and attaching
a fulfilment to the blank job order.
It is worth therefore familiarising yourself with the following two topics
:-
As before proceeding, as the processing steps for both stand-alone and
job related fulfilments are near identical.
About this Task
This topic outlines how to create a stand alone fulfilment.
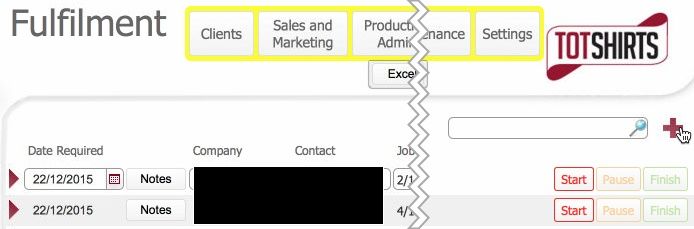
Prerequisites
Ensure that you have opened the Fulfilment
Layout
Procedure
- Click the new
record icon in the upper right of the layout.
- A new blank job order record
is created.

- Click the open
record icon to the left to open up the detail form layout.
- Navigate to the Fulfilments
tab
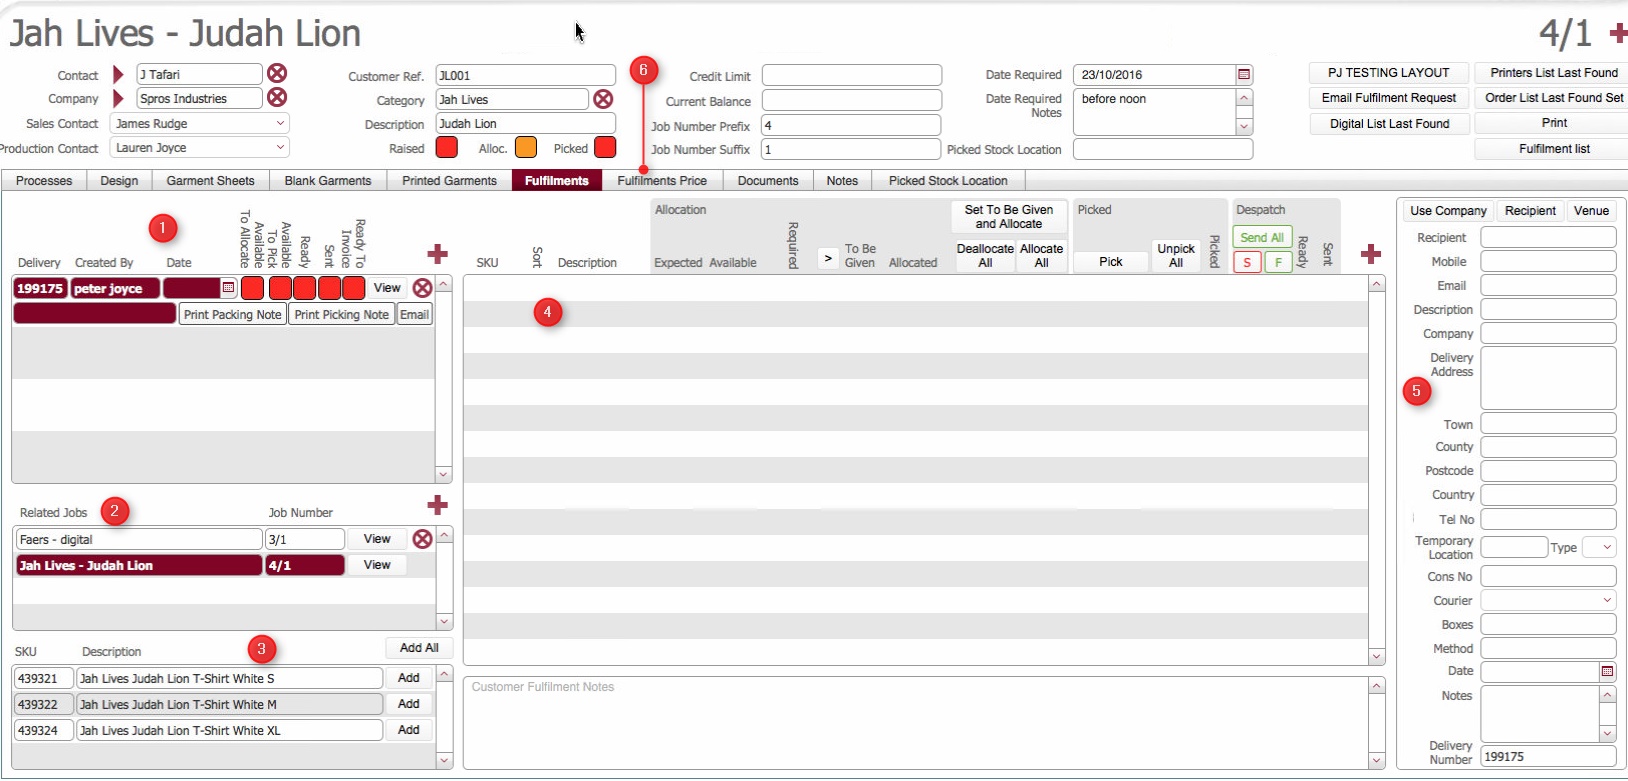
- Layout Composition
Take a moment to familiarise yourself with the layout contents.
At the top left pane (1) shows
any Fulfilment records on the job order. As this is a brand new standalone
fulfilment record, there will be no entries in this yet.
The Related Jobs pane (2) and (3)
show any jobs associated to this delivery, and the products created
by each of the associated jobs.
(Note: you will not be using them as the fulfilment is not job related)
The fulfilment contents pane (4)
lists the actual contents of the fulfilment - i.e. which products,
and in what quantities, are included on the fulfilment.
The delivery pane (5) details
where the fulfilment will be despatched.
Note:
The delivery pane (5) and fulfilment
contents pane (4) are unique
per fulfilment record. That
is, they are linked to whichever fulfilment in the top left pane (1)is being viewed.
.
Selecting a fulfilment record to populate
- Click the View button besides
the required fulfilment record in the upper left pane (1)
to ensure it is in focus and selected.
Note how the delivery pane (5) becomes active.
Next, select the content of what will be included
- To add a stock line item to a fulfilment, click the new
record icon above the fulfilment
contents pane (4)

This will cause the item
picker form to open, from where you can select the required
items from the Item picker.
(See here for guidance on how to search
for and select items from the item picker)
Once added, ensure that you populate the To Be Given field with the
quantity of the item that you want to include in the fulfilment.

Tip: If you added a product
by mistake you can use the  icon at the end of the row to remove the product from the fulfilment
contents pane.
icon at the end of the row to remove the product from the fulfilment
contents pane.
- Once you have completed adding the products for inclusion in the
fulfilment,you must allocate them
now.
- You must then allocate the stock
items that you have added in the above steps.
This is now a required step to align with the functionality in the
vendor site where when a delivery order is placed, the stock is automatically allocated)
By allocating products to a fulfilment, they
are effectively "reserved" for
usage in the fulfilment, and not available for other fulfilments.
In stock balance terms, once a stock item is allocated on a fulfilment,
the available balance for the item is debited by the allocated quantity.
There are two
methods by which you can allocate the products to the fulfilment.
- Method One: You can
click the Allocate button beside
a single product row, which will allocate the To Be Given quantity
for that row.
To do so:-
- Click the
Allocate
button besides the single row

- This
will automatically allocate
an amount equal to the To Be Given
Quantity

- Note following
updates that occur:-
- Allocated
Quantity is credited
with an amount equal to the To Be Given
quantity.
- Available
Quantity is debited by an amount equal
to the To Be Given
quantity
The
Allocated status
will update to Green (Completed),
as Qty Allocated =
Qty To Be Given
Note: Allocating items
may result in a negative Available balance. This is normal as for
fulfilments you can order, and thus must allocate, against
stock items that are not yet manufactured. Specifically, you
can order a maximum of what's physically available
plus what is expected.
Once the expected items are manufactured and data entered,
then the available balance will credit with the quantity actually
manufactured, and come back into proof. (Assuming that the
quantity successfully manufactured is equal to the number
expected)
Method Two: You can
use the Allocate
All header button, which will automatically
allocate the needed quantity for all items on the fulfilment.
(In essence, this is identical to method one, but applies the same
process to all the items)
To do this-
Click
the Allocate All
header button..
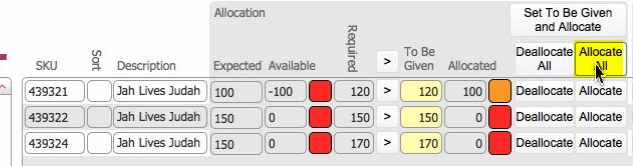
This
will automatically allocate
for any item that has a zero allocated amount an amount equal
to the To Be Given
Quantity
Note
following processes that occur:-
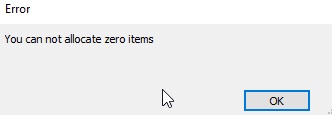
- strokeone
identifies those items on the fulfilment that have a zero
quantity allocated -"zero items"
- For
each zero item
- Allocated
Quantity is credited
with an amount equal to its To Be Given
quantity.
- Available
Quantity is debited by an amount equal
to its To Be Given
quantity
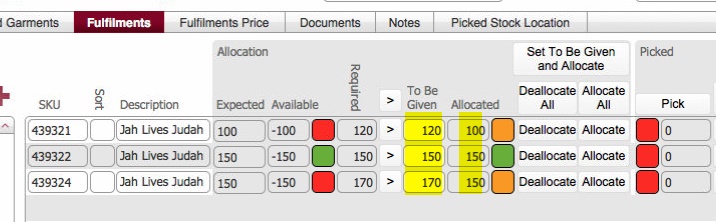
The
Allocated status is updated to
Green (Completed), as Qty Allocated = Qty To Be
Given
Notes:
Should
any item in the contents pane have a non zero allocated amount
"Non zero items", when the Allocate All button
is clicked, these will be ignored during the process, but strokeone will issue
a warning prompt:-
Allocating items may result in
a negative Available balance.
This is normal as for fulfilments you can order, and thus must
allocate, against stock items that are not yet manufactured. Specifically,
you can order a maximum of what's physically available
plus what is expected.
Once the expected items are manufactured and data entered, then
the available balance will credit with the quantity actually manufactured,
and come back into proof. (Assuming that the quantity successfully
manufactured is equal to the number expected)
Next you need to populate the delivery
details for the fulfilment.
Populating
Delivery Address Details
See Understanding
Delivery Address Details for overview of how we handle Recipients
and Address Details
- There are several main methods of populating the delivery
address. Typically the fulfilment will be delivered to a venue or client's address
that is regularly used,
and thus held in static data. Alternatively, the delivery address
might be a one off and unlikely to be used again.
- If the fulfilment is being delivered to a one off address
proceed to step 13)
- If the fulfilment is being delivered to the client's
address go to step 14)
- if the fulfilment is being delivered to a Venue go to
step 15)
- Manually populate the following fields :-
- Recipient
- Delivery Address
- Town
- County
- Post Code
- Country
and then proceed to step 16)
Click the Use Job Contact
button if the fulfilment is being delivered to the address of the
client recorded on the job order.
This will cause Recipient to be populated with the contact name, and
the delivery address to be populated with the address for the company.
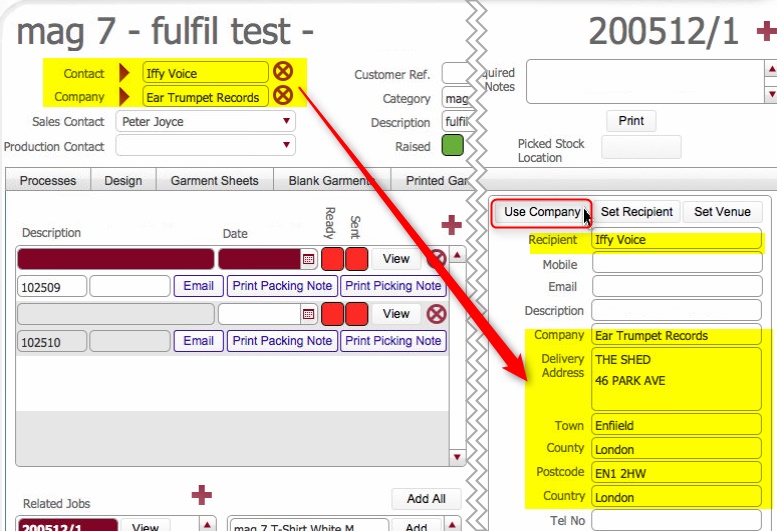
proceed to step 16)
If you wish to use a differing recipient
with these address details, click the Set
recipient button.
(see steps 15e below for explanation)
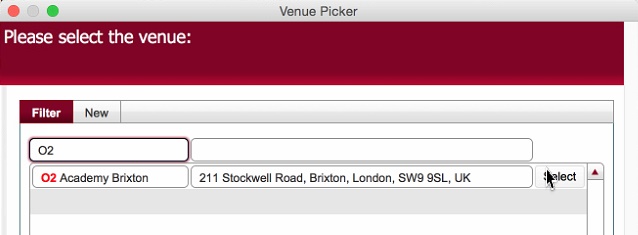
If the fulfilment is being delivered to a venue, click the Set Venue button to select a venue
from static data.
- This causes the Venue
Picker dialog to display, allowing you to select
(or if necessary create)
a Venue
- Once you have selected a venue you need to populate a Recipient.
- You can manually enter a recipient name for the venue.
- Alternatively, if the recipient will be regularly used
(or exists already) click Set
Recipient button
- This causes the Venue
Recipient Picker dialog to open, allowing you to select
a recipient, or indeed create a new one.
Tip: You can
use the Set Recipient
button to insert a recipient even if you manually populated
the address field, or used the Use Company button.
Note that
Venue Recipients are stored against a company value, so you
can only select a venue recipient with a matching company
value to the company defined on the job order.
See Understanding Fulfilment
Delivery Address Details for more details.
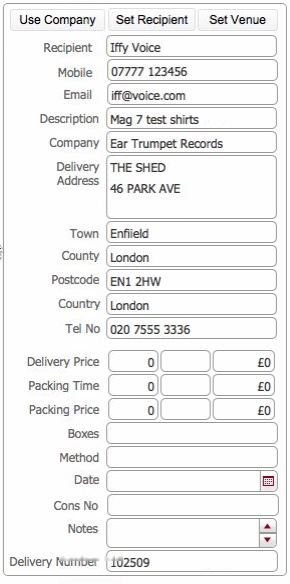
- Once the venue has been populated the Delivery Pane should look
something similar to this:-
click for example
Note:
a)The First line of the delivery address has populated the description
field in the fulfilment records pane (1)
b)Should you require it, you can over type any of the address fields
- Populate the remaining
fields in the address pane as follows:-
Field |
Comments |
Cons Number |
Enter here any reference
number from an external courier service should that be the despatch
Method
TBC:
Future dev requirement: PJ wants this to include the link to the
couriers electronic record, and expose this to the vendor site,
so that a client can click on this an see the courier's status**
* |
Courier |
If the fulfilment
will be despatched by courier
(in which case Method should
be defined as Courier), then this field records
which courier is used.
Select from the drop-down list the courier company. |
Boxes |
This is automatically
calculated based on information recorded during the
Box End Label process, and details the total
number of boxes that make up the Delivery |
Method |
The Despatch
Method for the fulfilment, e.g.
Customer Collection Courier
This field is exposed onto the Vendor Website, so it is strongly
recommended that you accurately populated this with the name of
the courier company that are being used, so that the client can
directly contact them if needed. |
Date |
Use the calendar
icon to select the Date which the fulfilment should be despatched.
Note: populating this will
cause the date field in the fulfilment
records pane (1) to populate
TBC:
Future dev requirement: PJ wants the earliest not yet delivered
date to back fill the related job records.** |
Delivery Number |
This is automatically
populated as per the fulfilment
records pane (1) |
Delivery Notes |
Enter here additional
delivery and/or any other pertinent instructions. |
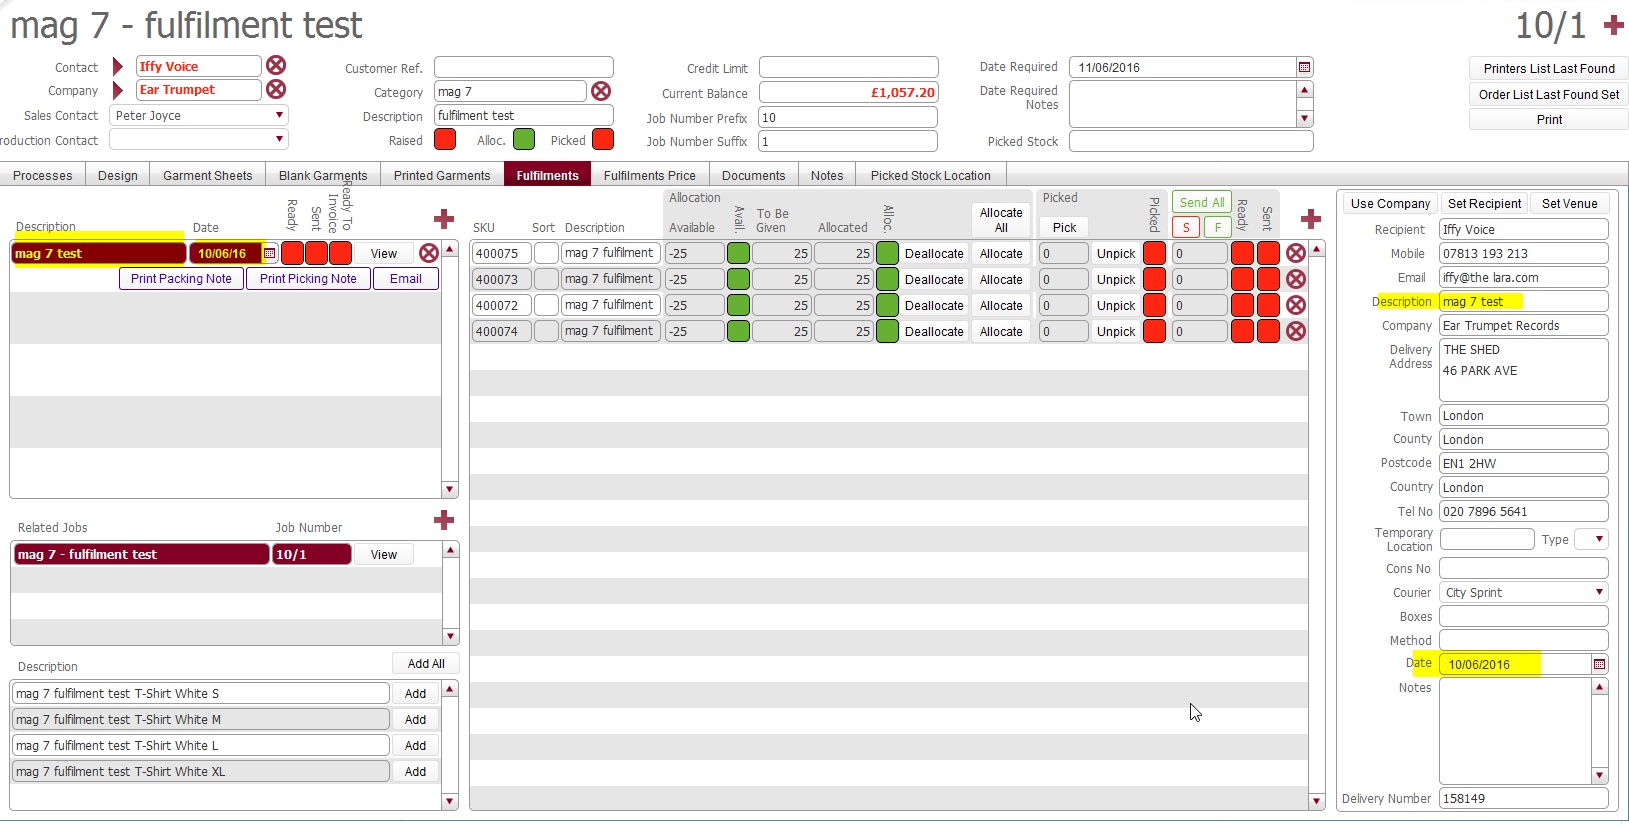
- The fully populated fulfilment should look something like the below
screen shot.
Click for example.
Note: if there are multiple
delivery records for this stand alone, i.e. you are populating a one to many
then you simply add another fulfilment record in the fulfilment
record pane (1) and
repeat steps 6) to 17)
but this time click the view button besides the fulfilment record you
just added in the top left pane.
Related Topics
Understanding Fulfilments
Item Picker
Venue
Picker Dialog
Processing
a Fulfilment